 Italiano
  English
  Deutsch
  Español
  Français
  Русский
  日本語
日本語  العربية
  Türkçe
  한국어
한국어 A handbag can look simple from the outside while containing dozens of production decisions that are invisible in a sketch. Panel dimensions, material thickness, reinforcement, zipper length, hardware finish, handle drop, seam allowance, lining construction, logo position, packaging, and inspection tolerances all affect the final product.
A handbag tech pack converts those decisions into a controlled document that a pattern maker, sample room, material buyer, production team, and quality inspector can follow. Without that document, important requirements remain scattered across reference images, emails, chat messages, and verbal instructions.
A professional handbag tech pack is not merely an attractive drawing. It should explain what the handbag is, how it is constructed, which materials and components are approved, how dimensions are measured, which variations belong to the style, and what must be checked before production approval.
Techpacker’s handbag-specific guide describes technical sketches, construction details, measurements, a bill of materials, and costing information as common parts of a technical package. These elements provide a useful foundation, but a factory-ready handbag tech pack should also address hardware, branding, internal structure, tolerances, sample revisions, packaging, and quality control. Review Techpacker’s handbag tech pack guide.
This guide explains 12 sections that help turn a handbag tech pack into a usable production document. It is written for fashion startups, private label brands, designers, retailers, wholesalers, sourcing teams, and established companies developing handbags through OEM or ODM manufacturing.
RONEER reviews product briefs, drawings, material directions, samples, and technical files for custom handbag projects. The factory should still confirm feasibility, material availability, MOQ, sample cost, construction risks, and production tolerances before treating any document as approved for bulk manufacturing.
1. Start With a Clear Cover Sheet and Product Brief
The first page should help every person opening the file understand the project immediately.
A clear cover sheet may include:
- Brand name
- Style name
- Style number
- Product category
- Season or launch period
- Designer or product owner
- Version number
- Issue date
- Target customer
- Intended use
- Target quantity
- Target retail market
- Planned manufacturing route
- Confidentiality note where appropriate
The product brief should explain the main purpose of the handbag. A commuter tote, evening bag, crossbody bag, travel handbag, and structured top-handle bag require different construction priorities.
For example, a work handbag may need a padded laptop compartment, reinforced handles, a stable base, a secure closure, and an organized interior. A soft fashion shoulder bag may prioritize drape, light weight, surface texture, and a clean silhouette.
A handbag tech pack should separate fixed requirements from flexible preferences. If a 15-inch laptop must fit, that is a fixed functional requirement. If the buyer is open to a similar available lining color, that may be flexible.
This distinction helps the manufacturer propose practical solutions without changing the product’s core value. It also prevents the sample room from treating every mood-board detail as a mandatory production specification.
Brands that need to understand how technical files connect with factory stages can review RONEER’s handbag manufacturing process.
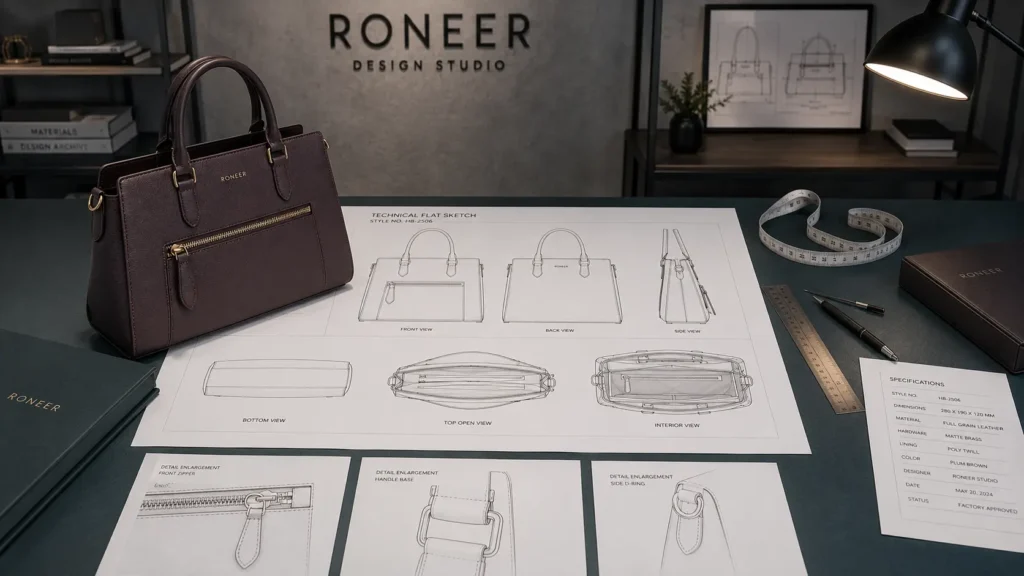
2. Add Technical Flat Sketches From Every Necessary View
Technical drawings should communicate construction rather than create a fashion illustration.
A factory-ready drawing normally includes:
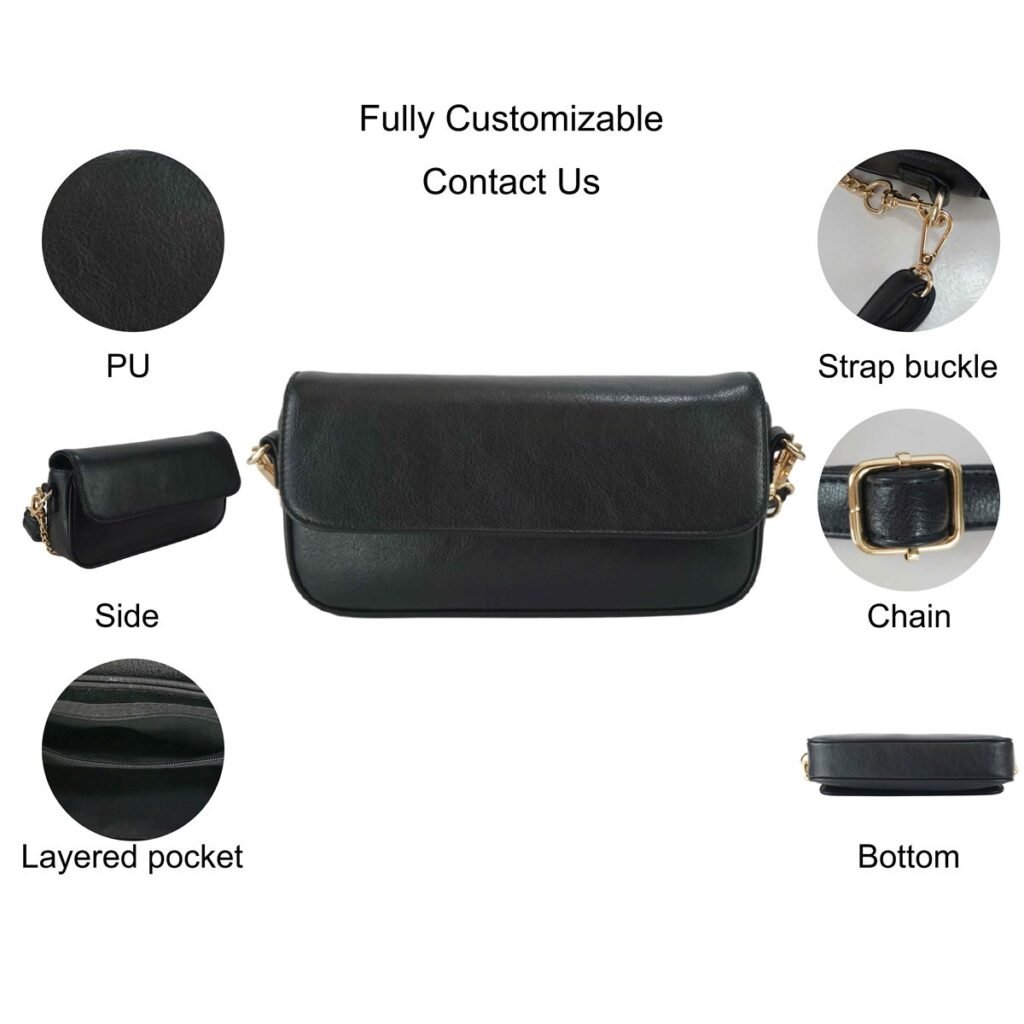
- Front view
- Back view
- Side view
- Bottom view
- Top or opening view
- Interior view
- Detachable strap view
- Close-ups of special details
The number of views depends on the design. A simple flat pouch may require only a few drawings. A structured handbag with gussets, several pockets, a detachable strap, custom handles, and a shaped base needs more visual information.
Each drawing should show visible seams, folds, panels, zipper positions, hardware locations, handle attachments, edge finishing, pockets, and closures. Detail bubbles or enlarged drawings can clarify areas that are too small to understand in the main view.
Avoid relying on shaded fashion renderings alone. They may communicate mood and color, but they often hide construction lines and proportions.
The handbag tech pack should also identify which drawing is controlling when two views appear inconsistent. For example, the side-view gusset depth should agree with the measurement table and the bottom-view drawing.
Use clear line weights, readable annotations, and consistent component names. The same part should not be called a “front strap,” “decorative tab,” and “closure piece” on three different pages.
3. Create a Complete Measurement Specification
Measurements turn the visual concept into a repeatable physical product.
A measurement page may include:
- Finished width
- Finished height
- Base depth
- Top opening width
- Gusset depth
- Handle drop
- Larghezza dell'impugnatura
- Handle length
- Shoulder strap length range
- Larghezza della cinghia
- Pocket dimensions
- Zipper opening length
- Flap length
- Posizione del logo
- Hardware position
- Bottom foot spacing
- Interior divider dimensions
Every measurement should have a clear point of measure. “Bag width” is not precise when the top opening, widest body point, and base width are different.
Use numbered measurement callouts on the technical drawing and match those numbers to the specification table. State whether the bag should be measured empty, filled, laid flat, or standing naturally.
A handbag tech pack should include tolerances where they matter. The factory needs to know whether a variation of 2 mm, 5 mm, or 10 mm is acceptable for a specific point.
Tolerances do not need to be identical across the entire handbag. Logo position, paired handle attachments, and flap alignment may need tighter control than the overall width of a soft unstructured bag.
Do not add arbitrary tolerances merely to make the document appear technical. Discuss realistic production variation with the pattern maker and manufacturer after the first sample.
For projects where dimensions and internal layout are still being developed, RONEER’s size and structure customization page explains common areas that can be adjusted.
4. Build a Detailed Bill of Materials
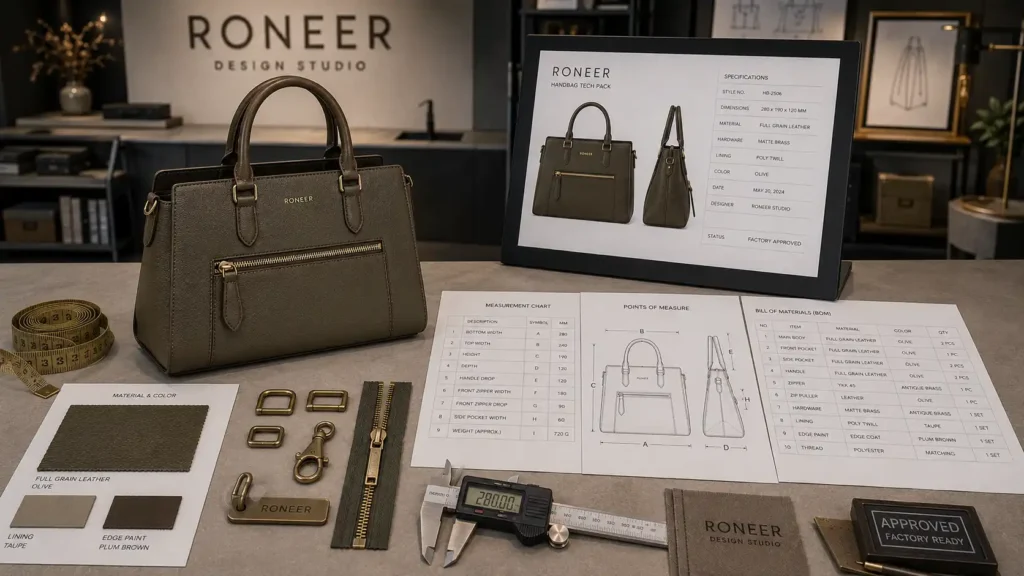
The bill of materials, often called the BOM, lists the materials and components required to make the handbag.
A handbag BOM may include:
- Main exterior material
- Secondary exterior material
- Fodera
- Pocket lining
- Reinforcement board
- Foam
- Nonwoven backing
- Interlining
- Webbing
- Il filo
- Vernice per bordi
- Adhesive
- Zipper tape
- Zipper slider
- Puller
- Magnetic snap
- Fibbia
- D-ring
- Gancio
- Chain
- Rivet
- Bottom feet
- Logo plate
- Labels
- Etichetta appesa
- Sacco per la polvere
- Polybag
- Carton
For each item, record useful information such as supplier reference, material code, composition, color, thickness, finish, size, quantity per bag, and approval status.
The handbag tech pack should not use vague descriptions such as “premium leather,” “good zipper,” or “gold hardware.” These terms are not measurable and can be interpreted differently by the buyer and the factory.
A stronger description might identify a microfiber material code, thickness range, surface grain, color reference, backing, and approved swatch date. Hardware may require a base metal, dimensions, finish reference, and an approved physical sample.
Material decisions affect structure, cost, MOQ, sampling, and repeat production. Buyers can review RONEER’s material customization options when preparing material directions for the BOM.
5. Explain Construction and Assembly Details
A flat sketch shows where components appear. Construction notes explain how those components should be assembled.
This section may include:
- Seam type
- Seam allowance
- Fold direction
- Turned edge or raw edge
- Edge paint layers
- Topstitch distance
- Stitch density
- Binding method
- Piping construction
- Reinforcement location
- Skiving area
- Glue area
- Handle attachment method
- Gusset assembly
- Base construction
- Flap construction
- Pocket assembly
- Fissaggio del rivestimento
- Final turning method
Use enlarged diagrams for complicated areas. A handle base may require an internal reinforcement piece, hidden stitching, rivets, and a specific edge finish that cannot be understood from the front view alone.
A handbag tech pack should identify construction priorities that affect appearance or strength. If the front panel must remain smooth, the factory needs to know where internal reinforcement or stitching may create visible marks.
When a desired construction is uncertain, label it for factory review instead of presenting an untested idea as a final instruction. The manufacturer may suggest an alternative that improves durability, production efficiency, or sample appearance.
The final construction method should be updated after sample approval. Do not leave outdated construction notes in the document after the physical sample has changed.
6. Specify Hardware, Zippers, and Metal Finishes
Hardware can change the weight, function, cost, MOQ, and appearance of a handbag.
The hardware section may cover:
- Locks
- Fibbie
- Anelli a D
- Moschettoni
- Sliders
- Catene
- Moschettoni magnetici
- Rivetti
- Screws
- Bottom feet
- Targhette con logo
- Zipper pullers
- Connettori per maniglie
For each component, include dimensions, shape, finish, quantity, placement, and attachment method. Custom components should also include tooling ownership, mold reference, approved drawing, and approval date.
Do not describe metal only as “gold” or “silver.” Polished gold, brushed light gold, antique brass, gunmetal, satin nickel, and matte black can produce very different results.
A handbag tech pack should show how hardware finish relates to zipper teeth, chain, rivets, bottom feet, logo plates, and other visible components. Mixed finishes should be intentional rather than accidental.
Zipper specifications should identify tape color, teeth type, teeth finish, slider, puller, opening length, end treatment, and whether the zipper is closed-end, open-end, or two-way.
If strength or function is important, define the required test or approval method with the manufacturer rather than relying on a brand name alone.

7. Document Logo Artwork and Branding Placement
Branding instructions should explain both the appearance and the production method.
The logo section may include:
- Vector artwork reference
- Logo width and height
- Position from fixed seams or edges
- Embossing or debossing depth
- Foil color
- Print color
- Metal logo dimensions
- Engraving direction
- Woven label size
- Label fold type
- Interior label position
- Zipper puller artwork
- Hangtag artwork
- Dust bag branding
- Packaging branding
A handbag tech pack should use measurements to control logo placement. “Centered on front” may still create disagreement when the bag has a curved top, asymmetrical closure, or visible handle bases.
State whether the logo is centered on the full bag, the front panel, the flap, the pocket, or another defined reference.
The file should also identify the correct artwork version. Old logo files are a common source of sample errors, especially when several email attachments have similar names.
RONEER’s personalizzazione del logo page covers embossing, debossing, printing, labels, metal logos, zipper pullers, and other methods used on custom bags.
8. Show the Interior, Lining, and Pocket System
The inside of a handbag often creates more production confusion than the outside.
Interior specifications may need to show:
- Materiale del rivestimento
- Lining color
- Fissaggio del rivestimento
- Zipper pocket
- Slip pockets
- Card slots
- Key leash
- Divider
- Laptop sleeve
- Bottle pocket
- Reinforced base
- Care label
- Country-of-origin label
- Brand label
- Security pocket
- Padding
Use an interior elevation, cutaway drawing, or open-bag view. A front exterior sketch does not explain where internal pockets begin, how deep they are, or how they attach to the lining.
A handbag tech pack should define pocket dimensions and usable openings. A pocket can meet its external measurements while still being too narrow for the intended phone, wallet, bottle, or laptop.
Where function matters, specify the object the pocket must hold and confirm it during sampling.
The document should also explain whether lining seams are bound, overlocked, turned, or hidden, and whether the lining is loose, drop-in, bonded, or attached to the exterior structure.
9. Control Colorways, SKUs, and Product Variations
A style offered in several colors can quickly create version confusion.
Prepare a separate colorway page showing:
- Style number
- Colorway name
- Main material color
- Secondary material color
- Lining color
- Thread color
- Edge paint color
- Zipper tape color
- Finitura dei componenti
- Logo finish
- Packaging variation
- SKU or product code
Use clear material swatches or approved references rather than relying only on screen colors.
A handbag tech pack should identify which pages apply to every colorway and which pages are color-specific. If the black version uses gunmetal hardware while the tan version uses light gold, that difference must be obvious.
Colorways can also affect labels, barcodes, cartons, and inventory records. GS1 US explains that each product variation may require a unique barcode, so brands should plan SKU and barcode information before packaging files are finalized. Review GS1 US barcode guidance.
Avoid using inconsistent names such as burgundy, wine, dark red, and color 03 for the same approved color. One controlled name and code should appear throughout the document.
10. Include Packaging, Labels, and Market Information
Packaging is part of the product specification because it affects protection, presentation, shipping cost, warehouse handling, and customer experience.
The packaging section may include:
- Shape support
- Carta velina
- Foam protection
- Protezione hardware
- Sacco per la polvere
- Tessera sanitaria
- Etichetta appesa
- Etichetta con codice a barre
- Polybag
- Silica gel, where appropriate
- Confezione regalo
- Inner carton
- Master carton
- Segno sul cartone
- Packing quantity
- Carton dimensions
- Gross and net weight fields
A handbag tech pack should show where labels and tags are attached and which information they contain.
Material claims must be accurate. The FTC’s Leather Guides cover products including handbags and address misleading representations about leather and imitation-leather composition. Brands selling into the United States should review applicable guidance before approving material descriptions. Review the FTC Leather Guides.
Country-of-origin information should also be planned before bulk packaging. U.S. Customs and Border Protection states that foreign-origin articles entering the United States generally must be legibly marked with the English name of the country of origin unless an exception applies. Review CBP country-of-origin marking guidance.
The importer or brand should confirm product-specific rules with qualified professionals. The factory can apply approved labels, but it should not be expected to determine every legal requirement for every destination market.
11. Manage Sample Comments and Version Control
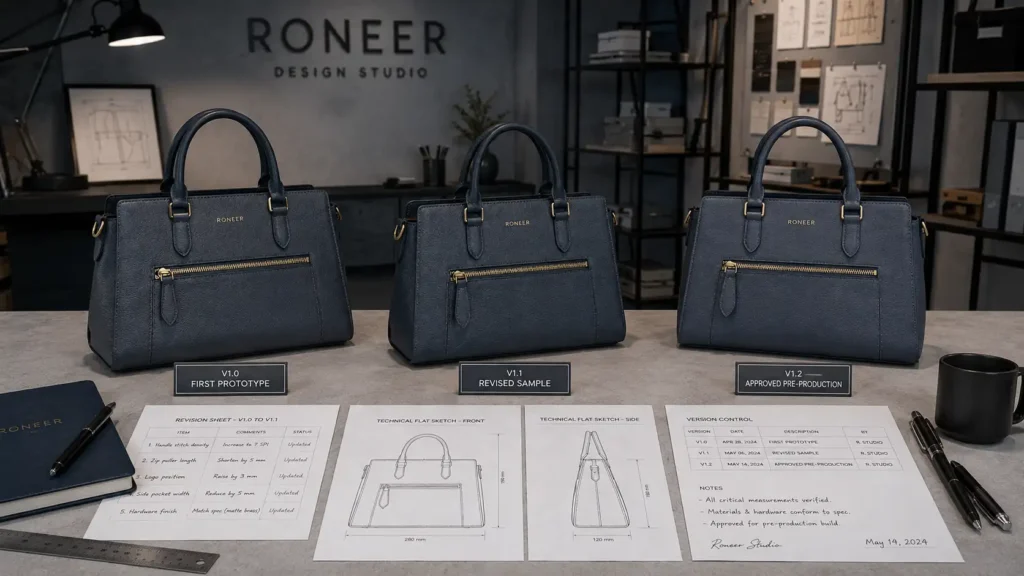
A handbag development project often moves through several revisions.
Without version control, the factory may use an old measurement table, outdated artwork, or a previous material choice.
Every handbag tech pack should include:
- Version number
- Revision date
- Revision author
- Summary of changes
- Pages affected
- Approval status
- Archived previous versions
Sample comments should be measurable and connected to drawings or photographs.
Weak comment:
Make the bag look more premium.
Stronger comment:
Reduce the front logo width from 42 mm to 34 mm, change hardware from polished gold to brushed light gold, increase the flap edge radius, and shorten the handle drop by 10 mm.
The handbag tech pack should be updated after every approved change. A separate sample comment sheet is useful during development, but the final technical package must reflect the approved result.
Use one naming convention, such as style number, revision, and date. Mark old files clearly as superseded so they are not returned to production accidentally.
12. Add Costing, Quality Control, and Final Approval
A complete technical package should connect the approved design to commercial and quality decisions.
The costing section maybe separatede:
- Main material cost
- Lining cost
- Hardware cost
- Zipper cost
- Logo cost
- Labor
- Imballaggio
- Tooling
- Testing
- Inspection
- Sample charges
- Quantity assumptions
The quality section may identify:
- Critical dimensions
- Measurement tolerances
- Material appearance standards
- Color approval
- Stitching expectations
- Logo position tolerance
- Hardware finish approval
- Zipper function
- Handle attachment
- Vernice per bordi
- Lining cleanliness
- Packaging checks
- Barcode and label checks
A handbag tech pack does not replace a physically approved sample. The document and approved pre-production sample should work together.
The final approval page should record:
- Approved style
- Approved colorway
- Approved sample date
- Approved material references
- Approved hardware finish
- Approved logo version
- Approved packaging
- Buyer approval
- Factory confirmation
- Remaining exceptions
For a broader view of how technical approval connects with sampling, production, quality control, and packaging, review RONEER’s OEM handbag manufacturing process.
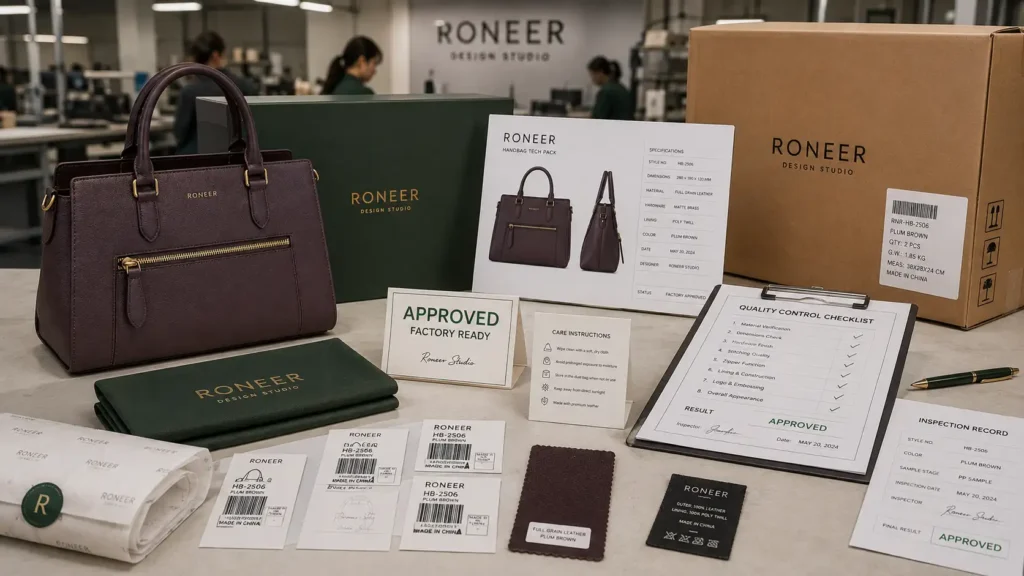
Factory-Ready Handbag Tech Pack Checklist
Before sending the file to a manufacturer, confirm that it contains:
- Cover sheet and product brief
- Style number and version number
- Technical drawings from the required views
- Numbered measurement points
- Measurement table and tolerances
- Bill of materials
- Construction notes
- Hardware specifications
- Zipper specifications
- Logo artwork and placement
- Interior and lining details
- Colorway pages
- SKU information
- Packaging instructions
- Label and barcode locations
- Sample comments
- Revision history
- Costing assumptions
- Quality-control checkpoints
- Final approval page
A concise file with complete, consistent information is more useful than a long document containing duplicated or conflicting instructions.
Common Handbag Tech Pack Mistakes
Using Reference Images Instead of Specifications
Reference images help communicate direction, but they do not define dimensions, materials, internal construction, ownership, or approved details.
Leaving Measurements Without Points of Measure
A measurement number is unreliable when the factory does not know exactly where it begins and ends.
Describing Materials With Marketing Language
Terms such as luxury, premium, strong, and high quality should be replaced with physical specifications and approved references.
Ignoring the Interior
External drawings do not explain lining attachment, pockets, labels, dividers, or reinforcement.
Mixing Several Revisions in One File
Old drawings, new BOM pages, and outdated logo artwork can produce an incorrect sample even when every individual file appears professional.
Treating a Tech Pack as Permanently Finished
The document should develop with the sample. Final construction and measurements should reflect what has actually been approved.
Omitting Tolerances
Without tolerances, minor acceptable variation and serious production deviation cannot be separated consistently.
Forgetting Packaging and Labels
The handbag may be correct while the barcode, origin label, dust bag, carton mark, or protective packing is wrong.