 English
  Deutsch
  Español
  Français
  Italiano
  Русский
  日本語
日本語  العربية
  Türkçe
  한국어
한국어 A handbag can look perfectly balanced in a rendering and feel completely wrong once it becomes a physical object.
The top handle may appear elegant on screen but sit too close to the opening. A slim side gusset may create the right silhouette while leaving too little usable capacity. A soft material can cause a structured design to collapse, while a thicker material may make corners bulky and change the finished proportions. Even a small hardware change can affect weight, balance, reinforcement, and the way the bag carries.
These are exactly the problems a handbag prototype is supposed to expose.
For fashion brands, product developers, sourcing teams, private-label businesses, and startup founders, prototyping is not simply the stage where a factory produces a prettier version of a sketch. It is the point where visual ideas are tested against dimensions, materials, construction, comfort, function, and manufacturing reality.
A useful handbag prototype should reveal what needs to change before those decisions become expensive during bulk production.
The goal is not to make the first sample look perfect. The goal is to turn an idea into a physical product that can be measured, carried, filled, opened, revised, documented, and eventually reproduced.
This guide explains nine practical stages buyers should understand when turning a handbag concept into a physical sample that can become a reliable production reference.
What Should a Handbag Prototype Actually Prove?
The first sample does not need to prove that every detail is perfect.
Its first job is to answer the questions that cannot be answered confidently from a drawing alone.
Can the intended shape actually be constructed?
Are the dimensions proportional?
Does the opening provide enough access?
Does the material support the silhouette?
Is the handle comfortable?
Are the pockets usable?
Does the hardware feel too heavy?
Does the bag remain balanced after it is filled?
Those answers matter because a handbag prototype sits between design intention and manufacturing execution.
A rendering communicates appearance. A tech pack records specifications. The prototype tests whether those decisions actually work together as a real three-dimensional product.
Brands that need support from design development through sampling can also review how a Custom Handbag Manufacturer connects design references, material selection, pattern development, sample revisions, quality review, and eventual bulk production.
The objective should not be to make the first sample look flawless at any cost. The objective is to learn enough from the handbag prototype to make the next development decision with less uncertainty.
1. Start With the Decisions the Prototype Needs to Test
Before asking a factory to make a sample, decide what you actually need to learn from it.
A buyer starting from a detailed tech pack may already know the approximate dimensions, materials, pocket layout, hardware, and logo position.
Another buyer may only have:
- A sketch
- A reference image
- A mood board
- A previous bag
- A CAD rendering
- An AI concept image
- Written product requirements
These projects should not be treated identically.
If the design is still early, the first handbag prototype may primarily test silhouette, proportion, opening construction, handle position, and capacity.
If the structure is already established, the prototype may instead focus on material behavior, hardware, branding, reinforcement, lining, or finishing.
Before sampling, identify which details are:
Confirmed
These should be reproduced as specified.
Preferred but adjustable
These can change if physical testing reveals a better solution.
Still open
These are decisions the prototype is expected to help resolve.
For example, the buyer may already have an approved overall width but still be unsure about gusset depth. The logo method may be confirmed while the final logo size remains open. The exterior material may already be selected while lining weight still needs comparison.
This distinction prevents one of the most common sampling problems: the factory believes a detail is approved while the buyer believes it is still being explored.
A clear prototype brief should therefore describe not only what the bag should look like, but also what the handbag prototype is expected to prove.
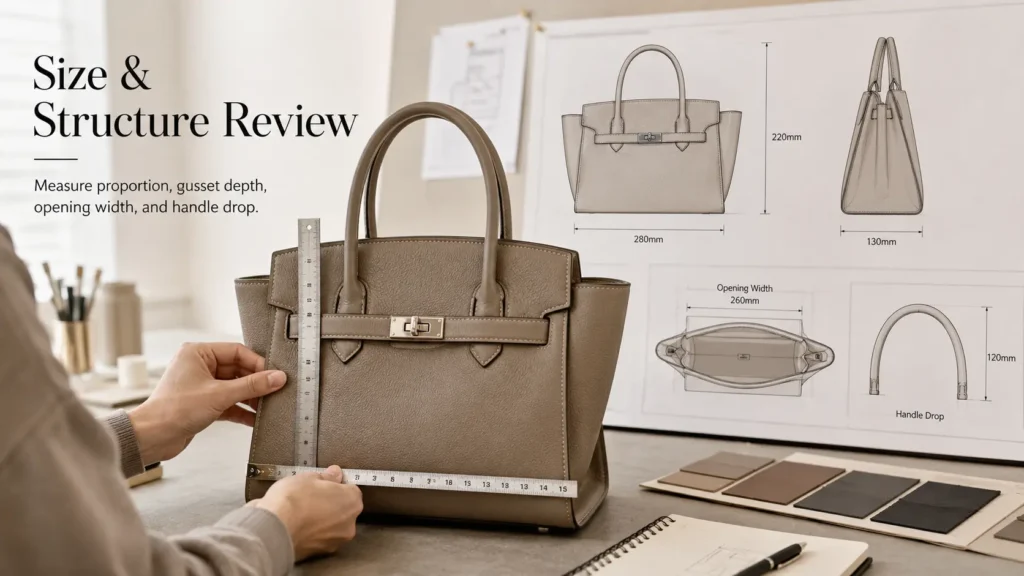
2. Translate the Silhouette Into Measurable Size and Structure
A front-view rendering can hide a surprising amount of structural uncertainty.
A handbag needs length, height, depth, gusset construction, bottom dimensions, opening width, handle drop, strap length, pocket depth, reinforcement, and internal volume.
Even two bags with similar outside dimensions may perform very differently because their openings, gussets, bottom construction, or internal layouts are different.
Before building the handbag prototype, review dimensions such as:
- Overall width
- Overall height
- Overall depth
- Bottom width
- Side gusset
- Top opening
- Handle drop
- Handle width
- Shoulder strap length
- Pocket dimensions
- Divider position
- Zipper length
- Logo position
This is where Size & Structure Customization becomes directly relevant. Dimensions, compartments, straps, pockets, closures, and capacity should work together rather than being treated as isolated measurements.
Dimensions should reflect the intended user and use case, not only the proportions of the reference image.
For example, a work handbag may need to accommodate a tablet, documents, charger, phone, keys, cosmetics, and a bottle. A compact shoulder bag may instead prioritize silhouette and carrying comfort over maximum capacity.
The handbag prototype lets the buyer check those relationships physically.
Put the intended items inside it.
Carry it by the handle.
Wear the shoulder strap.
Open the zipper with one hand.
Place it on a table.
Look at it when empty and when loaded.
A measurement can be technically correct while the actual product experience is still wrong.
If the bag feels too deep, too narrow at the opening, or visually unbalanced when filled, the buyer can adjust the structure before that problem reaches bulk production.
3. Choose Materials for the Prototype With a Clear Purpose
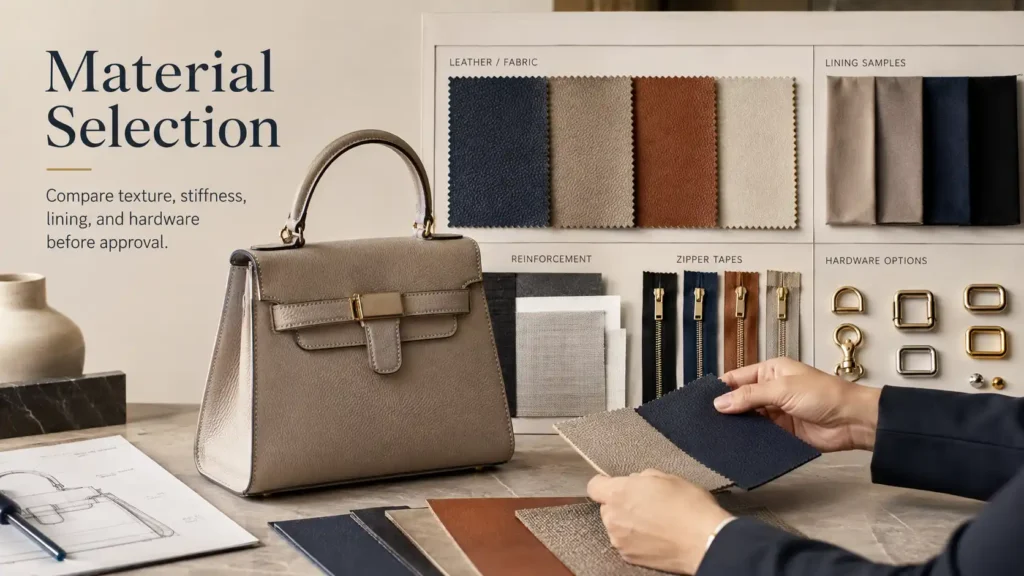
Material selection changes more than surface appearance.
It can change how the entire bag behaves.
PU leather, genuine leather, microfiber, canvas, nylon, woven fabrics, lining materials, foam, reinforcement, and backing materials can all influence stiffness, weight, folding, seam thickness, edge treatment, and silhouette.
That is why Material Customization should be considered before judging whether a prototype structure works.
For example, a soft material may cause a tote body to collapse inward. Adding reinforcement may improve the silhouette but also increase weight and thickness.
A thicker leather may give a firmer appearance while making a narrow turned edge more difficult to construct cleanly.
A lightweight nylon may suit a soft casual bag but require additional reinforcement around handles, zipper ends, or hardware attachment points.
When reviewing materials for a handbag prototype, consider:
- Surface texture
- Thickness
- Softness or stiffness
- Backing
- Weight
- Grain
- Fold behavior
- Edge construction
- Compatibility with the logo method
- Compatibility with reinforcement
- Compatibility with hardware
- Lining behavior
- Color appearance on the actual substrate
If the exact bulk-production material is not available during an early development round, the substitute should be clearly identified.
Do not accidentally approve the color, hand feel, stiffness, or surface finish of a temporary material simply because it appears on the first handbag prototype.
For textile color development, the official Pantone Fashion, Home + Interiors textile color system provides physical color references for materials including cotton, nylon, and polyester. Pantone also notes that different materials have different achievable color ranges, which is why the actual production substrate should still be reviewed rather than relying only on a digital color value.
Material choice should ultimately support the structure, price positioning, branding method, intended use, and production requirements of the project.
4. Build the First Physical Handbag Prototype to Find Problems
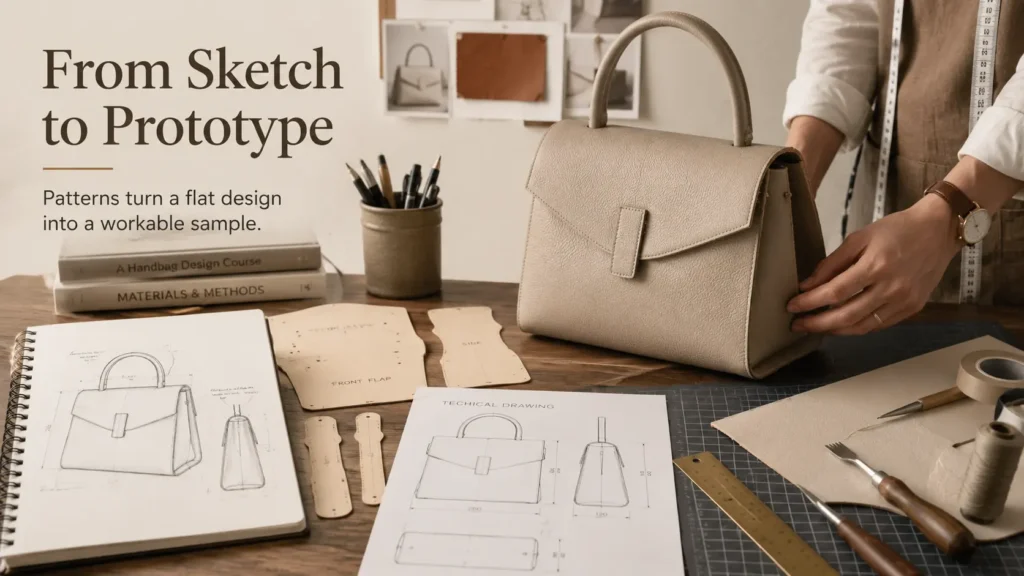
Pattern making converts the product into individual pieces that can actually be cut and assembled.
Depending on the handbag, these may include:
- Front panel
- Back panel
- Bottom
- Side gussets
- Zipper panels
- Flap
- Handle pieces
- Shoulder strap
- Pockets
- Lining pieces
- Dividers
- Reinforcement components
At this point, drawings become physical geometry.
Curves have to meet.
Seams consume material.
Thickness accumulates at folded edges.
Hardware requires attachment space.
A zipper needs enough room to operate.
A lining needs to fit inside the shell without excessive bunching or tension.
That is why the first handbag prototype should be treated as a diagnostic tool rather than a final presentation sample.
If the side panel wrinkles, investigate why.
If the opening pulls inward, examine the zipper panel or reinforcement.
If the handle leans away from the body, review its attachment angle.
If the bottom appears wider than the design intent, check pattern relationships rather than simply asking the sample maker to “make it look better.”
Specific feedback creates better revisions.
Instead of:
Make the shape more elegant.
Use:
Reduce the upper gusset width while maintaining the approved bottom capacity.
Instead of:
The handle looks wrong.
Use:
Increase the handle drop and move the attachment points inward according to the marked sample photo.
A good handbag prototype turns subjective reactions into measurable development decisions.
It also helps separate design problems from manufacturing problems. Sometimes the sample looks different because the pattern needs revision. In other cases, the original dimensions or material choice created the unwanted result.
Understanding the cause is more useful than simply requesting another sample.
5. Review Proportion, Capacity and Carrying Experience Together
Design teams often inspect a sample standing upright on a clean table.
Customers rarely use bags that way.
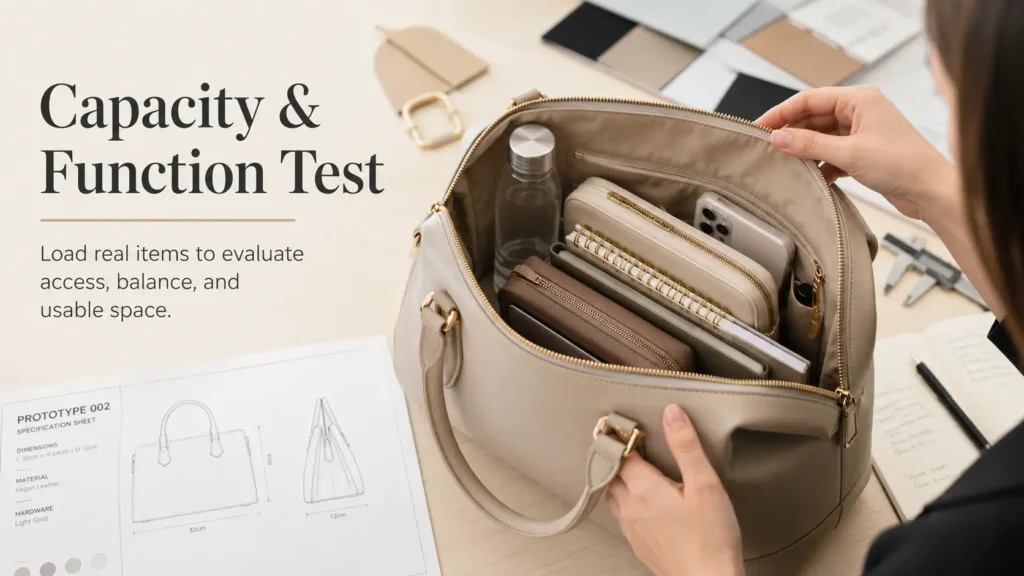
Fill the handbag prototype with realistic contents and examine what changes.
Look at:
- Overall silhouette
- Side profile
- Bottom shape
- Handle angle
- Strap position
- Opening access
- Pocket access
- Weight distribution
- Hardware position
- Logo visibility
- Closure alignment
A handbag prototype may look excellent when empty and lose its intended character once loaded.
For example, adding weight can pull a soft top line downward. A narrow handle may become uncomfortable. A magnetic closure may become harder to align. A shoulder strap attachment can cause the body to tilt forward.
Capacity testing is equally important.
Do not judge internal volume only from outside dimensions.
Check whether the intended contents can pass through the opening and whether they interfere with pockets, dividers, zippers, or closures once inside.
For a commuter handbag, that might mean testing a tablet, notebook, charger, wallet, phone, bottle, and cosmetic pouch.
For a smaller fashion handbag, the key items may be a phone, card holder, keys, sunglasses, and compact cosmetics.
This is particularly important when the product is being designed around a defined consumer use case.
The prototype needs to work as a bag, not only resemble the original concept.
6. Check Hardware and Branding on the Actual Bag
Hardware and branding should be evaluated as part of the finished construction.
Common handbag components may include:
- Zipper sliders
- Custom zipper pullers
- Buckles
- D-rings
- Swivel hooks
- Magnetic snaps
- Turn locks
- Rivets
- Chains
- Metal feet
- Logo plates
- Strap adjusters
A hardware item may look attractive on a component board and still feel wrong on the finished handbag prototype.
A buckle may be visually oversized.
A chain may make a lightweight bag feel unbalanced.
A heavy metal logo plate may pull a soft panel forward.
A magnetic closure may be positioned correctly when empty but become difficult to align when the bag is filled.
Hardware finish also needs to be considered as a set.
If several components come from different sources, “gold” or “silver” alone may not provide enough control over how the finished combination looks.
Branding requires similar attention.
Review:
- Logo method
- Logo dimensions
- Position
- Color
- Orientation
- Distance from seams
- Interaction with folds
- Reinforcement behind metal branding
- Appearance after the bag is filled
Embroidery, screen printing, heat transfer, debossing, embossing, woven labels, patches, and metal logos interact differently with different materials.
A logo that looks centered on a flat pattern may shift visually once the body expands.
Final logo approval should therefore be made on the handbag prototype whenever possible rather than relying only on a separate branding sample.
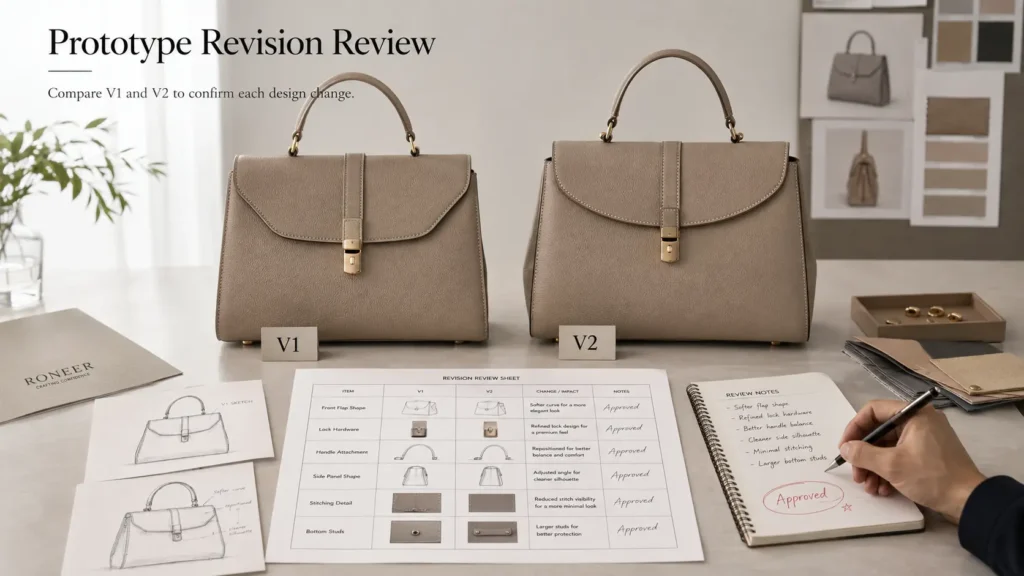
7. Record Revisions Instead of Relying on Memory
The first sample often generates many comments.
The risk is not having revisions.
The risk is losing control of them.
A buyer may write one change in an email, another on a photograph, another in a messaging app, and another during a video call.
By the second handbag prototype, nobody is completely certain which comments are still valid.
Use a controlled revision record.
For each requested change, identify:
- What is wrong
- Where it occurs
- What needs to change
- The revised measurement or reference where possible
- Whether the specification needs updating
- Whether the material changes
- Whether related components are affected
Photos with numbered annotations can be useful when they correspond with written revision notes.
For example:
Revision 01 — Top Handle
Increase the approved handle drop.
Revision 02 — Front Logo
Move the logo downward according to the marked position.
Revision 03 — Side Gusset
Reduce width at the upper edge while keeping the bottom dimension unchanged.
Revision 04 — Lining Pocket
Increase the opening width to fit the intended phone size.
When the revised handbag prototype arrives, review it against this change list rather than judging it as though the project has restarted from zero.
If Version 2 corrects the handle but accidentally returns to the old pocket size, the revision record makes the conflict easier to identify.
That makes sampling cumulative.
Each prototype round should remove uncertainty rather than create another disconnected version of the product.
8. Know When the Prototype Becomes a Production-Ready Sample
A visually attractive sample is not automatically production-ready.
Before the handbag prototype becomes the basis for bulk production, the important development decisions should be controlled.
Confirm areas such as:
- Finished dimensions
- Construction
- Material references
- Color
- Lining
- Reinforcement
- Hardware
- Logo
- Stitching expectations
- Pocket layout
- Straps and handles
- Functional performance
- Labels
- Packaging
- Approved revision version
The goal is repeatability.
A sample maker can sometimes manually correct a difficult detail on one prototype. That does not necessarily mean the same detail can be reproduced efficiently during bulk manufacturing.
Ask whether the construction used in the sample represents the construction intended for production.
If the factory plans to change the material, reinforcement, seam method, hardware, pattern, or finishing process before bulk production, those differences should be reviewed before the handbag prototype is treated as the final standard.
A production-ready sample is therefore not merely the version the buyer likes most.
It is the version whose important specifications can be documented, communicated, reproduced, and inspected.
Depending on the project, there may be several development samples before that point is reached. The number matters less than whether the major product decisions have actually been closed.
9. Use the Approved Prototype as a Production and QC Reference
The value of prototyping does not end when the buyer approves the sample.
The approved handbag prototype should help define what bulk production is expected to reproduce.
The production reference may combine:
- Approved physical sample
- Current tech pack
- Measurement chart
- Material swatches
- Hardware references
- Color references
- Logo artwork
- Revision record
- Packaging specification
- QC requirements
This gives production and inspection teams something more precise than photographs or memory.
The approved handbag prototype can then be referenced during first production review, in-line checking, finished-product inspection, and packaging review.
Where lot-based acceptance sampling is used, ISO 2859-1:2026 defines sampling schemes indexed by acceptance quality limit, or AQL, for inspection by attributes.
That type of sampling framework does not replace a clear, approved sample, specification, measurement chart, or defect requirement.
Inspectors still need to know what the finished product is expected to be.
This distinction matters because AQL answers a different question from prototyping.
The prototype helps define the product.
Inspection helps evaluate whether production conforms to defined requirements.
A controlled handbag prototype, written specification, material references, and revision record should therefore be established before final inspection decisions are made.
Quick Handbag Prototype Review Checklist
Before approving the project for the next development stage, check:
| Prototype Area | What the Buyer Should Verify |
|---|---|
| Sample version | Correct prototype and revision |
| Proportion | Shape matches the intended design direction |
| Dimensions | Width, height, dept,h and key measurements |
| Structure | Gussets, bottom, reinforcement and opening |
| Capacity | Intended contents fit and remain accessible |
| Materials | Correct or clearly identified temporary references |
| Hardware | Appearance, size, function and attachment |
| Branding | Logo method, scale, location and finish |
| Carrying | Handle drop, strap length and balance |
| Interior | Lining, pockets, dividers and accessibility |
| Revisions | All comments recorded and version-controlled |
| Production readiness | Important details can be reproduced consistently |
A handbag prototype should not move forward simply because no one notices an obvious visual defect.
A more useful question is:
What decisions are still open, and could any of them materially change the finished bulk product?
If the answer includes major dimensions, primary material, hardware, construction, branding, or function, another development review may be justified before production approval.
This simple checklist is especially useful when several people participate in the decision, such as the designer, buyer, sourcing manager, factory merchandiser, and quality team.
What Should You Send a Manufacturer Before Prototyping?
The clearer the starting information, the less interpretation the sample room needs to make.
Useful information may include:
- Sketches
- Technical drawings
- Reference photographs
- Existing physical sample
- Approximate dimensions
- Target capacity
- Material direction
- Color references
- Hardware preferences
- Logo artwork
- Pocket requirements
- Handle and strap requirements
- Intended contents
- Packaging requirements
- Estimated order quantity
A detailed tech pack is valuable, but not every early-stage project begins with one.
If some decisions are still open, label them as open.
For example:
Preferred body width: approximately 32 cm; final proportion to be evaluated on prototype.
This tells the development team that the measurement is a starting direction rather than a locked production specification.
The first handbag prototype can then be used deliberately to resolve that decision.
Buyers should also identify what the factory is allowed to recommend. If material thickness, reinforcement, zipper construction, or internal layout is still flexible, saying so allows the development team to provide alternatives instead of guessing which details are fixed.
What If the First Handbag Prototype Is Disappointing?
Do not evaluate the first prototype only by asking whether you like it.
Ask why it is different from what you expected.
Separate problems into categories.
Design Interpretation
The physical sample did not reflect the intended visual direction.
Specification Problem
The original dimensions or instructions created the unwanted result.
Material Problem
The selected material changed the shape, hand feel, thickness, or construction.
Pattern Problem
The pieces or proportions need adjustment.
Component Problem
Hardware, zipper, reinforcement, or another component is unsuitable.
Expectation Problem
A quality that looked achievable in a rendering does not translate directly into physical construction.
This diagnosis is much more useful than sending a long list of subjective comments.
For example, if a structured bag looks too soft, simply writing “make it more structured” leaves several possible solutions open. The real decision might involve material thickness, backing, reinforcement, seam construction, or a combination of these.
A successful handbag prototype process does not depend on the first sample being perfect.
It depends on each round making the final product more clearly defined and more repeatable.
FAQ About Handbag Prototype Development
1. What is a handbag prototype?
A handbag prototype is a physical development sample used to evaluate how a handbag design works in three dimensions before bulk production.
It can help buyers review size, proportion, structure, material behavior, hardware, branding, capacity, carrying comfort, and construction.
2. Do I need a tech pack before making a handbag prototype?
A detailed tech pack can reduce ambiguity, but some development projects begin from sketches, reference images, CAD files, existing samples, or written requirements.
The important point is to identify which specifications are already confirmed and which decisions the handbag prototype is intended to test.
3. Is a handbag prototype the same as a pre-production sample?
Not always.
An early handbag prototype may be built primarily to test shape, pattern, size, or structure.
A later pre-production sample normally reflects a more complete set of approved materials, components, branding, dimensions, and construction requirements.
The terminology should be clarified with the manufacturer because factories and buyers may use sample names differently.
4. How many handbag prototypes are normally needed?
There is no universal number.
A straightforward modification of an existing structure may require fewer revisions, while an original design with unusual construction, custom hardware, new materials, or complex internal features may require additional rounds.
Instead of targeting a fixed number, use each handbag prototype to close specific unresolved decisions.
5. Can a handbag prototype use substitute materials?
Yes, during early development this can sometimes be practical.
However, temporary materials should be clearly identified.
A substitute may allow the buyer to evaluate dimensions and general construction but may not accurately represent final stiffness, color, texture, weight, edge finishing, or logo appearance.
6. What dimensions should I check on a handbag prototype?
Common measurements include finished width, height, depth, gusset width, bottom dimensions, opening width, handle drop, strap length, pockets, dividers, zipper openings, and logo position.
The required measurements depend on the design and intended use.
7. Why does my handbag prototype look different from the rendering?
Digital images do not fully represent material thickness, seam construction, reinforcement, gravity, hardware weight, usable internal volume, or how the bag changes after being filled.
A handbag prototype reveals these physical relationships and allows the design to be adjusted accordingly.
8. Should the logo be finalized on the first handbag prototype?
Not necessarily.
An early sample may use temporary branding if the main purpose is to evaluate shape or structure.
Before production approval, however, logo method, size, position, color, and interaction with the final material should be confirmed on an appropriate sample.
9. How should I give handbag prototype revision comments?
Use numbered, specific comments tied to photographs, measurements, drawings, or specification changes.
Avoid vague feedback such as “make it more premium” or “make the shape nicer.”
Explain what needs to change and, where possible, provide a measurable target or marked reference.
10. When is a handbag prototype ready for bulk production?
A handbag prototype is closer to production-ready when important dimensions, structure, materials, hardware, branding, function, labels, packaging, and revisions have been confirmed, and the intended construction can be repeated during bulk manufacturing.
Final approval should also identify the exact sample and specification version.
11. Can an approved handbag prototype be used for quality inspection?
Yes.
An approved physical sample can be an important visual and construction reference when it is paired with written specifications, measurements, material references, artwork, packaging instructions, and defined inspection requirements.
The sample alone should not replace documented specifications.
12. How can RONEER support handbag prototype development?
RONEER can support OEM/ODM handbag projects through requirement review, material sourcing, size and structure development, hardware selection, logo trials, sample revisions, packaging customization, quality inspection, bulk-production coordination, and repeat-order documentation.
The exact handbag prototype development route depends on the design, material direction, structure, branding requirements, quantity, and information supplied by the buyer.
Conclusion
A handbag prototype is most valuable when it exposes decisions that still need to change before production money is committed.
The buyer should use the prototype to evaluate more than appearance.
Size, capacity, gusset construction, handle proportion, material stiffness, reinforcement, hardware weight, pocket access, branding, carrying comfort, and manufacturing repeatability all deserve attention.
The process also needs documentation.
A revised handbag prototype is useful only when the buyer and manufacturer can identify what changed and which version represents the current requirement.
For RONEER OEM/ODM handbag projects, development can connect design references with material sourcing, size and structure adjustments, hardware selection, logo trials, sample revisions, packaging planning, quality inspection, and eventual bulk-production coordination according to confirmed project requirements.
A well-developed handbag prototype therefore does not simply show what the future product may look like.
It turns an idea into a physical, measurable product that can be reviewed, corrected, documented, and eventually reproduced with less uncertainty.